Continuing on from Introduction to Pole Work in this article I will take you through some of my favourite exercises for strength and suppleness, before looking at accuracy and adjustability exercises in Part 3.
The reality is that most quality poles exercises have a far-reaching range of benefits, but breaking them up in this way will hopefully be a little less overwhelming for you to begin including them in your training!
Things to remember before you start
- Careful not to do too much at once. Pole exercises – even in walk – can be strenuous, and so it’s important to give your horse frequent breaks and not do too much in one session. This is especially important if your horse is unfit or hasn’t done much of the exercise before.
- Do an adequate warm up. In your warm up, make sure your horse is travelling in a nice even rhythm and is relatively balanced, supple and connected for its degree of training. Make sure to spend an adequate amount of time on each rein, plus transitions within the pace are incredibly helpful too.
- Adjust the distances to suit your horse. The distances provided are a guide only. Once you’ve taken your horse through a couple of times you will see if you need to move the poles to make the distance more comfortable.
Poles in walk
Beginning with poles in the walk is ideal for young, weak and inexperienced horses, but it also builds strength and suppleness. With no moment of suspension in the walk, the work to step over the poles relies entirely on the horse’s muscles. This helps strengthen the core and hindquarters, while building mobility in the pelvis and hocks.
Setup
Place four to six poles in a row (start with one or two if the horse is new to pole work). The average distance is 0.8 to 1 metre apart, but adjust it to what suits your horse.
Riding the exercise
Encourage an active walk approaching the poles and keep your horse straight through the middle, softening your elbow to allow them to look down at the poles.

Variations
Once your horse is doing this comfortably, you can mix it up by riding the poles on an angle to encourage a longer stride, or raising the poles to increase mobility in the joints and strengthen the core.
Zigzag poles
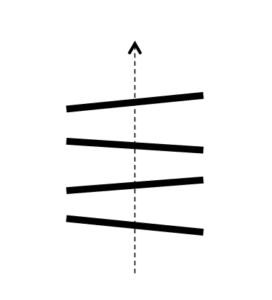
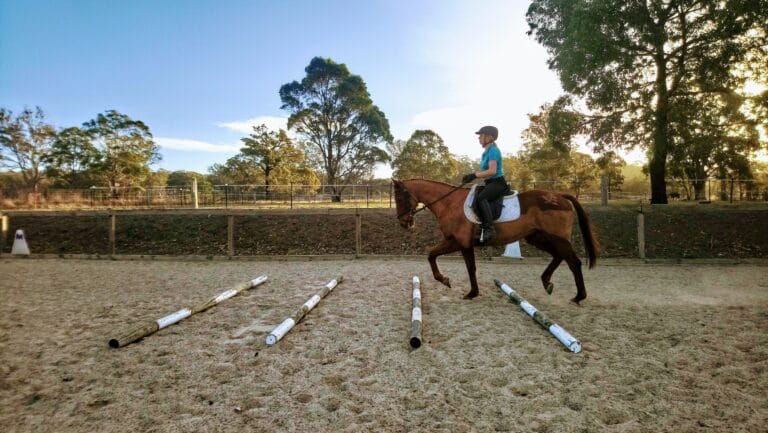
In addition to the usual benefits of pole work, zigzag poles encourage the horse to look down at the poles and lift through their wither as a result. It also challenges you to maintain a straight line and even rhythm.
This exercise is typically ridden in trot, although you can start in walk and adjust the distance accordingly. Make sure you have warmed up over straight trot poles before doing this exercise.
Setup
Place four to six poles at your horse’s comfortable trot pole distance. This is typically 1.2 to 1.5 metres apart but adjust this to what your horse finds comfortable. Then move the ends of the poles alternately closer together and further apart, so that they form a zigzag shape. The centre of the poles should remain at your horse’s comfortable trot distance.
Riding the exercise
Establish a good working trot, then approach the exercise on a straight line, riding centre of the first pole to centre of the last pole. A half halt before the first pole will remind your horse to balance and concentrate on what’s ahead, then soften through your elbows to allow your horse to lower its head slightly and figure out the exercise. Keep both legs on and your eyes up to maintain straightness.

Fan of poles in canter
Poles on a curved line, also known as a fan, is beneficial in all paces but it’s one of my go-to exercises for improving the canter. Your horse has to maintain the rhythm and place their feet correctly, all while maintaining an even bend over the poles… and you need to be riding well to make this happen!
This is especially useful for horses who aren’t supple on both reins, as it encourages them to use both sides of the body equally. It also helps them use their back and build strength in their core and hind quarters. If you jump, this exercise is excellent practice for creating a quality canter while maintaining your line in order to find a good distance.
Setup
Start with three poles 2.7 metres apart (9 feet or 3 paces). Bring the inside of the poles closer together and the outside further apart so that the curve that goes through the middle forms a 20 metre circle. You can also set them up to be 6 feet (2 paces) apart on the inside and 12 feet (4 paces) apart on the outside, but that does make the circle a little smaller and more challenging.
Riding the exercise
If you are new to the exercise, it is wise to start in trot to find your line and practice maintaining a consistent bend. If the poles are setup for canter, ride with two steps between each pole when trotting.
Set up a good rhythm and put yourself on a circle that will take you over the centre of the poles. You may need a few goes for you and your horse to figure it out. Make sure you are looking around the circle at the poles to find a good line and distance, and make sure you don’t drift from the outside to the inside or vice versa.

Tip
Are you struggling to get a good distance to the first pole? First, make sure you have a quality canter where your horse is in front of the leg but balanced and not rushing. Next, instead of aiming for the first pole, aim for the spot on the other side of the first pole where your horse’s forelegs will land.
Variations
This exercise can be quite hard work for your horse. One way to use it, while giving your horse enough freedom to travel forward in the canter, is to alternate between a smaller circle that takes you over the poles and a larger circle that takes you outside the poles. Once you’ve cantered over the poles, open up the canter for the larger circle, and then close it up a little as you spiral back down to the smaller circle to prepare for the poles again.
Once you are comfortable with the exercise you can increase the difficulty by adding more poles or raising alternate poles.
In the final article in this series, we will look at some exercises to help with stride control, accuracy, and finding a distance.
Featured Image: Credit Christine Armishaw


