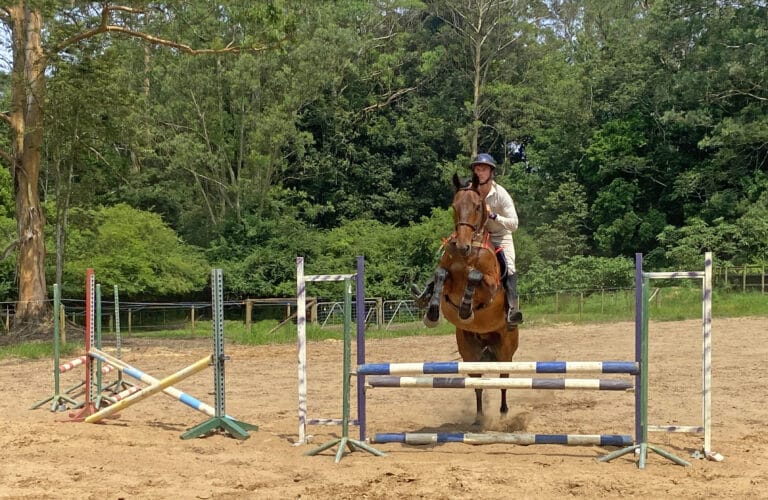
In the final part of his teaching young horses to jump series, CHARLIE BRISTER moves on to combination fences and related lines.
In our last issue we got off to a flying start (hopefully not flying off the horse but over jumps!) when we talked about a vital stage of a horse’s education: introducing your youngster to jumping. Now, this isn’t solely for show jumping horses or eventers. There are lots of benefits to jumping small fences with your dressage or trail riding horse too. So read on.
Recap
In the January/February issue we focused on introducing a horse to jumping for the first time using a small jump and guide rails. It is vital to start small with these exercises and gain confidence before progressing, so let’s go over some key points from Part One to jumpstart your memory:
- Flatwork before jumping: show jumping is just flatwork with a few jumps in the middle.
- Rider position: weight down into the heel and a balanced upper body.
- Jumping: eyes up and leg on.
- Departing jumps: focus on straightness
Progression
Now it’s time to start jumping multiple fences. This could be either a combination or a related line before building up to a course. What is the difference between a combination and a related line? Well, a combination can be either two or three jumps in a line with either one or two strides between each fence. A related line, on the other hand, is when the distance between the jumps is greater, let’s say between four and ten strides apart (you will very rarely see three strides between jumps in show jumping). Therefore how you jump one fence will affect the next jump, because they’re related to each other.
Each horse is different so you will have to make an assessment as to what you do after jumping a single fence. Quite often having a related line with a second fence straight ahead after five strides is an easy to understand progression (see diagram).
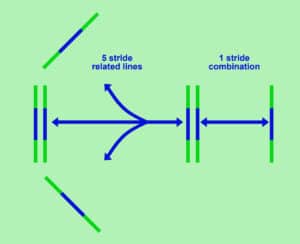
An example related lines and combination set-up.
Flatwork
As the difficulty of jumping increases, the demands on a horse’s flatwork will similarly increase. You need to be able to change the pace of the canter not only on straight lines but also in turns. When rebalancing the horse from a bigger canter, do they stay straight through the body? Or, do the quarters fall in or out? This is something to be aware of when doing transitions within the pace.
The aim is to be able to rebalance the canter while keeping the horse’s neck long and the body straight. If the neck shortens and the quarters start swinging you might be asking for the rebalance a bit too abruptly. Try riding a smoother half halt. If it’s still occurring go down a pace and practice rebalancing the trot while focusing on straightness.
Flying changes
These are an essential component of smooth course riding. As you land after a fence, the ability to perform a clean flying change can increase your chances of a clear round. If you haven’t got your horse doing their changes yet, go back to the May/June 2021 issue for the first of my two part series on flying changes. In the meantime, change lead through trot to avoid having an argument with your horse. The changes will come with patient flatwork and consistent practice.
Related lines
As with anything concerning horses, there can be a lot of variation between related lines. They can be straight or curved in either direction. Quite often a course will have related lines that cover all of those options: straight, curved left and curved right. You will see this in show jumping and definitely in cross country, because the course designers are looking to test your training. They don’t want you to have problems, but they do want the course to show you possible holes in your training. Can you jump a left curving line as easily as a right curving line? Ideally your horse is balanced in both directions, but as we all know it is impossible for horses (or their riders) to be completely even on both sides.
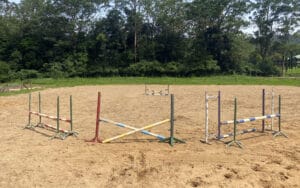
A slightly different set-up proving you don’t need many fences to create variety.
Introducing combinations
Start with two jumps set two strides apart. To make it as easy as possible, place the poles on the ground. When your horse can trot and canter over the poles comfortably raise the height so they have to jump. Using guide rails between the two fences (see Part One) can help maintain straightness. Also, using cross rails can help keep the horse in the middle of the jump. There is not a lot of time for adjusting the horse between fences in a combination. The important thing is good preparation followed by small adjustments to maintain the line and tempo as much as is practical. Don’t have a big fight with your horse in between the fences if they wobble or change speed. Try and make small changes so their focus stays on the fence in front of them.
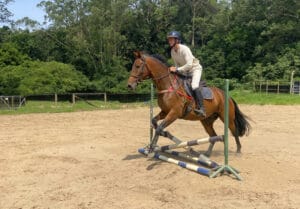
Above: Although jumps for youngsters are small and simple, keep your eyes up and heels down.
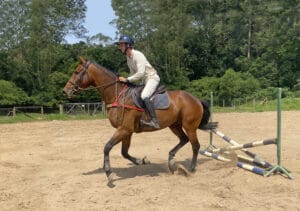
Above: Landing in a light seat after the first jump with eyes on the next fence.
Change one thing at a time
This principle can apply to all areas of riding and training horses. By only changing one part of the exercise you minimise the chances of your horse getting confused or over-faced. Think about how you could make a jump physically and mentally more challenging. Then as your horse progresses, increase the difficulty of only one of those elements at a time. For example, you believe it’s now appropriate to increase the height of the combination. At the same time you place a blue tarp under the second fence. This is raising the height (physically more difficult) and adding a tarp (mentally more challenging). You are therefore increasing the chances of having a problem.
In this situation, first get your horse going over small jumps while increasing the spookiness of the fence, which allows them to easily accomplish the task physically even if they do think it’s spooky. Once they are jumping confidently over that you can raise the height. So keep in mind that generally speaking, when you change an exercise or a jump, change only one thing at a time. The object is to educate your horse while building their confidence.
Finishing the exercise well
Last issue we talked about ensuring your departure after the fences remains as straight as possible. This will stop the horse dropping a shoulder and anticipating the turn before you ask. Also, you want to keep riding the horse after you have practiced your combination or related line. This means you finish with clear downward transitions, or ride the horse onto a circle. Do not let them finish the exercise in any old way. Make it a quality end to the exercise and be consistent about it.
Doing this will keep your horse focused and they will stay more balanced when you are riding longer courses. If they switch off after a few fences you will have to do a lot more work to get them organised again. The better your departure, the easier your approach to the next fence.
Learn more about teaching a young horse to jump with Charlie Brister with his bonus video for our VIP Members here.

